Showing posts with label Accessories. Show all posts

The Vintage Honey Teething Necklace

I've got to tell you guys about the greatest thing I've found in a while.
Teething necklaces! And I'm not talking about the ones you see all the babies wearing now (although, those are pretty great too) I'm talking about super cute ones that YOU get to wear, and your baby gets to chomp on, without worry of it breaking or scratching them.


The Vintage Honey Shop sent me a ridiculously cute necklace to test out, and I just LOVE it! First off they chose the perfect color for me, I'm not sure if they are mind readers or what, but it's exactly what I would've picked myself! It's a grey, cream and yellow damask... perfection.

After admiring the perfect print for a while, I tied it on and Sage instantly grabbed a hold and gave it a thorough inspection. He then chewed on it for a few minutes... it worked. He was chomping on something other than the straps of the carrier or my hair! Woot!


So, he liked it, which was important, but was I going to like wearing it? I already had on of those silicone teething necklaces, which I did like, but it was sometimes a pain to wear... literally, it would stick to my hair and that really isn't much fun. But, The Vintage Honey teething necklace ties on with a soft ribbon, so no hair pulling at all. Plus, because it tied on I could adjust the length to fit perfectly. I also really like how light weight it is. I hardly notice that I'm wearing it most of the time. (unless there is a 21 pound baby pulling at the other end of it)

The other great thing about the necklace is it doesn't necessarily look like a 'teething' necklace. I've had people tell me how cute my necklace is, and then a few minutes later (when Sage is chomping away) go 'OH! Is that made for him to chew?! That's so awesome!' So, I guess it could just be a necklace, but it's great that it's both!


Did I mention that they package it up so stinking cute?! I felt like I was opening a birthday present or something. This would be such a sweet thing to have sent to an expecting or new mom as a gift. It would make her day, and everyday after that, because she will probably wear it all the time!... I do!

So, if you are a mom, or know someone that is I highly recommend checking out The Vintage Honey Shop. They have tons of necklaces on their site, and some of them are even organic! Plus they make bracelets and nursing scarfs (which really you could wear anytime too) that are just as cute as the necklaces.



200 follower giveaway!

I'm back from my trip and getting all caught up with everything! The most exciting thing being a great giveaway to you! I decided that getting to 200 followers is a momentous occasion, and I have all of you to thank! So, a few of the lovely ladies from my sidebar and I have put together a fun little giveaway to celebrate! Check it out.


Fun stuff huh! Well, enter below and it can all be yours! Good luck!

a Rafflecopter giveaway


Insta FRIDAY!!!

WooooooHoooo!  It's FRIDAY!!!
Can you tell I'm excited?!  LOL!

I didn't do an Insta-Friday post last week, so I just may overwhelm you with pictures again!
Don't worry, they are awesome!

Look at this face! LOVE!  Averie got her hats and look how cute they are on her!

I couldn't leave the boys out, I made one for Landon too!

He makes for a great model.  Love him!

Just pretty.  That's all.

Famer's Market yumminess!

Tried a new beer this week.  New Belgium's 'Dig' pale ale. It's light and super tasty!  Try it!

I don't know what gas prices are looking like in your neck of the woods, but ours are getting ridiculous!

Oh yeah, and I grilled a few more times this week!

Delicata squash, potatoes, onions, leeks, and sweet potatoes!

First artichokes of the year and beets!  If you haven't tried them BBQ-ed DO IT!
They are to die for!

Well, that about sums up my week.
How was yours?


linking up with:
life rearranged


2012 New Year blogging party!

Hello everyone, and happy last day of January!  Can you believe it?!  I can't really.  This month flew by!  
I have a really fun post today!  A few weeks ago I signed up for the new year blogging party. 

Photobucket

It's a fun new year's gift exchange for us bloggers put on by Alycia, Casey, and Danielle.  Basically they matched us up and we took it from there.  I was paired up with the lovely Melanie from Keeping up with the Cantelmo's.


Keeping up with the Cantelmo's

Isn't she cute!  She is a blogging mom of 3 adorable little peanuts, and she just announced last week that it will be 4 soon!  Congrats girl!
So, I got her gift in the mail tonight and get to show it to you all!

First off, she wrapped it in damask tissue paper! {love}


Then I actually opened the gift, and boy did she spoil me!


A cozy scarf, bracelet and a cute necklace!  So fun!

I wanted to get some fun photos of me wearing them, my tripod is M.I.A., so beware these pictures are not awesome. lol.


This was my attempt to get everything in the picture... it almost worked! lol!

Thanks Melanie for the fabulous gift!  You guys should check out her blog and see what I got her!

Also check out the rest of the exchanges here:


Photobucket

I hope you all have a wonderful rest of the month!


yeah, I made that... nbd

I am so excited right now!  I just FINISHED my first actual crochet project!
I know, I know, I'm a nerd, but I'm still excited!  It looks pretty good, not all wonky like my previous attempts at crocheting!  See:


I got the pattern from this great yourube video:


Now I want to do more!  I think I may be in need of a new scarf!


Polyvore... a new addiction in the making!

I have come across a new {and probably addicting} site today thanks to Melissa over at Pineapple Lilly... it's called Polyvore!  Have you heard of it?  It reminds me a little of paper dolls, but for us big girls of course.  I just played around for a minute and created a 'if I actually had somewhere nice to go for Christmas' outfit.


a girl can dream right.

So, if you feel like making one of your own go check it out.


Bad hair day turned good

Ever have those days where you wake up and think 'why do you hate me hair!?'  Well, I did today.  I woke up to a stringy mess of hair.  I decided to try (again) to wash my hair every other day, so it was kind of expected.  The bad part is I never really do my hair, at least not for work.  I just let it air dry, or pull it into a pony.  I keep it simple.  But today I had to DO my hair.  lol.  So, a few handfuls of baby powder (yep, baby powder! it's a blonde girls best friend!) a bit of teasing, clipping, and covering with headbands I actually got a pretty cute do!


Messy and fun.  Maybe I'll start 'doing' my hair more often. =)

OH!  I found out today that my team did win our costume contest!  Yay us!

Ribbon Jewelery Frame

I have been in need of a new solution for my earrings for a while now.  I have a neat stand that my husband made me years ago out of perforated stainless, but it was better for posts than 'hook' earrings.  So, I thought I'd go ahead and make myself something I could attach all kinds of earrings on. And I came up with this.


And, since I was making it I figured I could share! So, here we go.  You only need three things to make this project:

an old (or new) frame - which I happened to have saved for something like this

ribbon - I chose a semi-stiff transparent ribbon, so I could poke earrings through easily

and last but not least -  hot glue


First thing's first, take your old frame...


and remove the print, glass and backing.
Now you will have a blank frame.


I measured out where I wanted my ribbon, but you can eyeball it if you want.  Next dab a little bit of hot glue on one of your marks and attach your ribbon.


After it has cooled down a bit I like to add another layer of hot glue on top, and fold down the tail of the ribbon.  It looks like a globby mess of hot glue, but it should hold well.


Attach all the ribbons to one side and let them cool before attaching them to the other side.


Do the same on the other side, making sure to pull the ribbon pretty tight. Cut off any extra ribbon.  And you're done!


Super fast and easy project that is super cute and practical!


Now I just have to finish filling it with all my earrings!

If you make one yourself I would love to see them! It could be so fun with different ribbon, or painting the frame a fun color.  Hope you enjoyed!

Flower Hair Accessory Tutorial

I FINISHED!!!  Yay!


These actually were pretty quick and easy once I figured out how to make them, so I thought I'd create a tutorial to share!

This all started with a trip to a local bridal boutique, shopping for my friends wedding dress, and our bridesmaid dresses.  When she went to try on veils we found that even a really simple veil was about $200! So, I told her I would be happy to make her veil for her (I made mine and it was pretty easy).  Then when we looked at hair pieces for us bridesmaids they were pretty pricey too.  So I thought (out loud) I could make those... and so, I made those. ;)  It worked out nicely, she got the EXACT color that she wanted, and I made all eleven for the price of one from the store!

So, here it goes, my first full tutorial. Sorry for the not so awesome pictures.

First of all here is what you are going to need:


Flowers or Flower petals
Felt
Tulle
Feathers (I chose two kinds)
Rhinestones
Hair clips or combs
Hot glue
Scissors
I also used a rotary blade and mat, but that's optional

The first thing I did was cut my tulle into 6 inch squares. I did so with my rotary blade, but scissors work just fine.  You will need two squares for each hairpiece you are making.  I made 11 so I needed 22.


Then I cut all my felt pieces.  I made them all hearts.  Why? Why not!  I could have just made a circle, but this was more fun!


Now comes the fun part!  If you have pre-made flowers then this is an easy step for you, just glue your flower to the felt!  If you are using petals like I am (we could not find a single hot pink flower) Then follow along.
Take your first petal add a dot of hot glue on the base and center it on your felt.


Now continue until you have a full flower.  Tip: flowers usually have an odd number of petals, so try to do 5 or 7 if you can.  I did 7 each.


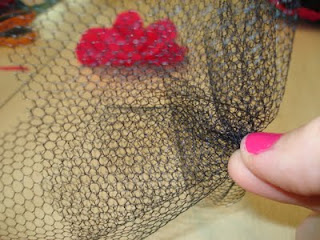
Now that your flower is done it's time to add the tulle!  I took my two 6 inch squares and laid them on one another like this:


Then I pinched the center and twisted it up like this:


That's what give it that nice wavy texture.  Then apply hot glue on the twist and apply it to the center of your flower.  When I did this I found it was easier if I stuck a pin in the twist to help hold it while I glued.


Pull open the tulle to the way you want while the glue is still hot.  Also, if you used a pin pull it out now too.  Press down on your center to get it as flat as possible.  Warning: YOU WILL GET HOT GLUE ON YOUR FINGERS!  If you want to avoid this use the back of a pen or something for this step.

Now it is time for FEATHERS!  I found these feathers on a band at Michaels.  I thought they were neat because some of them have little seed beads up the quill.  Anyways, I played around with the amount I wanted to use, and decided on 4 or 5, so I cut a small section and trimmed the end a bit.


After I played around with the placement I glued them to the center of the flower.  Now it looks like this.


I wanted a little more body in there, so next I added a 'fluffy' feather the same as the others.


Now for a little SPARKLE!  I used simple and inexpensive rhinestones for the centers.  They give a nice sparkle, and hide all the ugliness in the center. When you apply the rhinestones make sure to apply the hot glue to the center of the flower, and then place the rhinestone on top.  When I tried to apply the glue straight to the rhinestone it 'melted' a piece of the reflective backing off and ruined it.


Almost done!  Flip your flower over so it is face down.


See, the heart is super cute!  ;)  Even though you will never really see it, its there.
Now to add you clip.  Make sure it is facing the right direction so when you put it in your hair it's not upside-down.  Add a dab of hot glue where the base of your clip should be and attach.


And Voila! You are done!


Just to give you an idea of how big they are and how they actually look in your hair.


All eleven of them!  Yup, she has a lot of friends!  Love you Steph!


Related Posts Plugin for WordPress, Blogger...
Pin It button on image hover