Showing posts with label Decor. Show all posts

Making My Happy Spot


A while back I read the book Happier at Home, which inspired me to create a spot filled with things to make me smile and inspire me. It also brought to my attention the fact that I over think everything causing me to never get things done. So, I got the nudge to just go for it and not worry if it turns out perfect or not. This is harder than I’d like to admit to, but sometimes inspiration comes and you just go with it.

My inspiration to make myself a happy space came to me from one of my favorite creative gals, Lindsay from Pen & Paint. She makes the cutest prints that have the greatest quotes, and I just love them! I picked two prints that I just had to have and waited patiently for them to arrive. When they got here I was so excited and then quickly fell into my usual ‘oh the possibilities, what am I going to do with them?!’ contemplations. I know, I’m crazy.

I finally decided on making a wall of Happiness and started to gather other prints, pictures and things that make me smile. I picked a wall and laid it all out and just did it! It felt so good to get it up and to finally have a spot for myself, even if it is just a wall.


One of the prints says ‘Do small things with great love.’ This one really speaks to me right now. One of my personal goals is to do everything with love. For all those I am around and especially for myself. I think that we tend to be the hardest on ourselves, when we should love ourselves completely. I am so glad to have this daily reminder to keep me on track!


Some of the other things I added to my Happiness wall:

A painting a friend made for us of the spot that Matt proposed to me. I just love that she did that for us, and love to think of that day!
A vintage needle point of a basket of flowers, because who doesn’t need that!?
A Nikki McClure calendar. She cuts out all of her prints by hand with an exacto knife. Inspiring for sure!
The little owl that my baby sister talked a shopkeeper in Germany into selling her because she knew I would like it. It wasn’t for sale, but she was determined.
The abalone shell is from our yearly camping trip to Albion and I filled it with succulents because it was just begging for it!
And most importantly, pictures of my family. Okay, mostly Sage. They bring a smile to my face no matter what is going on.


All of this above my cozy chaise filled with too many pillows and a bouquet of fresh flowers to boot!


Now I have this space where I can read a book, play with Sage, crochet or just sit and be inspired by where I’ve been and where I am heading. It’s my new happy spot, it’s not perfect, but it’s exactly what it needs to be.


Need some inspiration in your life? Lindsay is so kindly offering a $20 credit to her Pen & Paint shop for one of you lovelies! Pretty awesome right!? She has so many amazing things in her shop, I just know one will speak to you too!

To enter please use the rafflecopter form below. This contest will close on Sunday the 27th at midnight. The winner will be emailed and will have 48 hours to respond or a new winner will be chosen. Thank you all so much and good luck! Happy Monday!

PS… Make sure to checkout Pen & Paint on instagram, her posts always brighten my day!


at home dilemmas of an interior designer

Say you wanted me to design your living room.
I'd ask you a few questions, maybe show you a few pictures, find out what you really need and take some measurements.
Then I'd come back with a whole wonderful design, you'd be happy and that would be it.

NOW, lets go to my house. I quickly got it to unpacked and livable then stopped.

I have too many ideas, too many likes, too many options, and I stare at it all day thinking of new ones...

I'd say this is not uncommon in the design field. I even had a teacher once that told us 'your house will never be done, and will always be the last thing you want to do!'

It's so true! Before it was that I was designing and sewing and painting all day at work, so it was the last thing I wanted to do when I got home.

But now, I'm just overwhelmed, not only by options, but by the funkiness of our house. We are currently renting, so no painting, taring down stupid dropped ceilings or replacing a soooo outdated kitchen.
I have made peace with this now, and am moving forward!

I already know that i want to cover the {ugly paneling} walls with art and pictures, take down the tacky blinds that only half work and hang curtains instead and have Matt make us some sweet new furniture! We pretty much sold everything when we moved.

Then I can re-evaluate.

Before starting any project I always look for good inspiration.
Then I find the theme from everything that caught my eye, and go from there.
So, here is my inspiration as of now. and yes, it's on my pinterest!


So, it looks like a neutral pallet of white, grays and woods with pops of color here and there.
I'd say my style is a bit mixed. Thriftstore-modern-industrial. That's a thing. Seriously.

Now I have to do it! That's the hard part, getting motivated. But, I'm there, ready to DO!

How do you get motivated for big projects?


Thrifty Thursday!

Now that we are getting settled{ish} in our new place I'm starting to get a feel for what we still need. We pretty much sold all of our furniture before we moved, so we need a lot. Lucky for me my husband is awesome and is going to build us furniture... but that takes time. Soooo, I've started hitting the thrift stores.
I was really just looking for furniture pieces, but I couldn't help but check out everything else. So, what did I find?

Clothes! Like I need anymore! lol! BUT they were super cute and only $2 a piece!

I also found a ton of fabric. I never thought to get fabric from a thrift store, but they had tons!
Some of it is super cute vintage and some is just cute. $8 for all of that! A few of those are a couple of yards each! I'm not sure what I'll do with them all yet, but I'm brainstorming!

Oh, and I got these bad boys...
Buahaha! SOOO kidding! They had these out like they were something special! I'm pretty sure that THIS is what most people think of when they think thrift store! I had to share!

But, the find of the day was this awesome mid-century table that I got for only $20!
After I got home I immediately googled it to see if I did in fact get a good deal, I knew it was well built and whatnot but I wanted to check. They are selling for $150-$300! Good deal indeed!

It's funny, when I brought it in and sat down I realized we haven't had a coffee table in years! Well, we did have one in our old house, but it was in our sitting room, not our living room, so we hardly used it. It's nice to have a coffee table again.

I think I'll hit up a few more tomorrow, there are tons of thrift stores in our town!

Anyone else find some good deals lately?


Spring cleaning!!!

I know, I know... it's almost summer, but hey, it's getting done!
I decided to spend my first and last free weekend for a long while doing some serious re-organizing.
Nothing fancy, just down and dirty cleaning and organizing.
I have had so many projects, and no time. Which led to me dumping stuff everywhere!
Seriously I couldn't walk into my office let alone actually do something in there!
So, I am taking back my space {and getting back my kitchen table!}
Of course I started with a little pin-speration...


Will it look like any of this? probably not! 
I'm working with what I have {which is a hodge podge of stuff)
In a teeny room, with FAR to much furniture!
BUT it will be better than it is! I'll keep you posted on my progress.

For all you owl lovers!

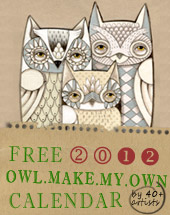
I came across the cutest printable calendars today, and they are all about owls!  I'm not sure when I began obsessing liking owls so much, but they are just so cute, and seem to be everywhere now.  When I saw this 'create your own' calendar I knew I had to share!

Owl Lover 2012 Calendar

So, get to it!  Make one, or more!  Or just print out the ready made one.  Enjoy your year of cute owls!

Ribbon Jewelery Frame

I have been in need of a new solution for my earrings for a while now.  I have a neat stand that my husband made me years ago out of perforated stainless, but it was better for posts than 'hook' earrings.  So, I thought I'd go ahead and make myself something I could attach all kinds of earrings on. And I came up with this.


And, since I was making it I figured I could share! So, here we go.  You only need three things to make this project:

an old (or new) frame - which I happened to have saved for something like this

ribbon - I chose a semi-stiff transparent ribbon, so I could poke earrings through easily

and last but not least -  hot glue


First thing's first, take your old frame...


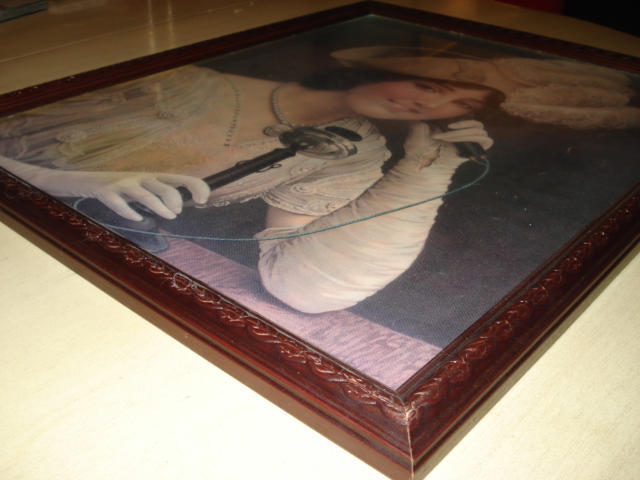
and remove the print, glass and backing.
Now you will have a blank frame.


I measured out where I wanted my ribbon, but you can eyeball it if you want.  Next dab a little bit of hot glue on one of your marks and attach your ribbon.


After it has cooled down a bit I like to add another layer of hot glue on top, and fold down the tail of the ribbon.  It looks like a globby mess of hot glue, but it should hold well.


Attach all the ribbons to one side and let them cool before attaching them to the other side.


Do the same on the other side, making sure to pull the ribbon pretty tight. Cut off any extra ribbon.  And you're done!


Super fast and easy project that is super cute and practical!


Now I just have to finish filling it with all my earrings!

If you make one yourself I would love to see them! It could be so fun with different ribbon, or painting the frame a fun color.  Hope you enjoyed!

Pom Pom Tutorial

I've had a few friends ask me about the fun Pom Poms I made for Melissa's baby shower. So, I thought I'd share it with everyone. :)

I used this tutorial I found from Martha Stewart but modified it a little to make Poms for the table instead of to hang.  Basically you stack tissue paper, fold it like an accordion, tie the middle with wire, cut the edges, and pouf! Pretty simple, though slightly time consuming if you are making a ton, like I did.  On her tutorial she has a very specific size for the tissue paper, but I played around with the sizes a lot.  I think I ended up making 4 different sized Poms. Also, since I was making flat bottom Poms instead of full Poms I used 5 or 6 sheets of tissue paper instead of the 8 that the full Poms call for.

Here is what you will need to do this project...


Tissue paper, scissors, wire and pliers...the longboard is optional, but recommended  ;)


Here is an up close view of my first finished Pom...


and here they are out on our giant table...


I love that big table!

Well, I hope that satisfies any curiosities.  If anyone decides to make them I'd love to see them in use!  We liked them so much that we found a place to keep them to use again!

Baby shower brunch


Last weekend we threw a baby shower for my new sister-in-law.  It couldn't have been a better day.  The weather was perfect, brunch was amazing (thanks to my mother-in-law) and everyone had a great time.
I was so excited to have this shower for her, it meant I could bust out my craftiness in a big way!  Not everything I set out to do made it to the party, but what did was super fun!  So, I thought I'd round up a few pictures and share the crafty goodness that came from this shower. =)
First off there were the invitations, simple but fun...


I wanted to hand make all the invites, but when the guest list reached 75+ I started to rethink it. So, I compromised with semi-hand made.  I bought simple invites, downloaded a cute font, and cut out and attached little pennants along the top.


Here are some shots from the shower.

Walkway into the yard.

Table with a bazillion hand made pouffes.

The super cute food cart.

 
Yummy treats.


Onesies decorated by all the guests.


LOVE LOVE LOVE how these turned out.


Love these little birdies.

I can't wait for the next party to come around! ;)

Related Posts Plugin for WordPress, Blogger...
Pin It button on image hover