Showing posts with label Craft. Show all posts

Sewing projects for the baby boy

Since I've been itching to sew something, but haven't quite gotten the time yet, I've just been collecting ideas! Since they are pretty fun I thought I'd share them too!


I think this 'little man gown' from The Cottage Home is too cute!

and this whale plush is so fun!

As Sage is growing out of his clothes faster than I can stand, I've been wondering what to do with all the super cute onesies that he barely (if at all) wore. I found this the other day, and just might give it a try, it's a baby hat made out of onesies from The Sewing Rabbit

And because I'm a hoarder thrifty gal, and have lots of old shirts waiting to be turned into something cool, I thought this idea from Small Fry is fabulous!

So, durring nap time one of these days, when there isn't a pile of laundry to fold, or a sink of dishes to do, I will be making one of these... I really want to sew up a ring sling too! So many ideas, so little time!

Do you have any fun boy projects to share? There seem too be far less boy things out there compared to all the girly patterns!


currently obsessing... crochet

I have some serious craftiness on the brain right now!
I just spent an hour{or two} searching for new crochet patterns.
I'm in the middle of a few projects right now, but am already looking for a new one!
Here are a few fun stitches and projects I found today!


Isn't that awesome!?! It's called Broomstick lace. I can't wait to try it!


I'm loving this crocodile stitch! I need to make a scarf like this!

I found a video tutorial for it too!


Yeah, I'm loving this! I want to make baskets for every room now!


I found this picture today, I'm going to have to figure out how to make that!


How fun would this be as a little baby throw or something?

I want to make them all! Lol!
I have a $50 JoAnns card burning a hole in my wallet, and I think I'm going to blow it all on YARN!

What are you currently obsessing over?


I'm doing a giveaway today

I'm over at Tutus and Tea Parties today with a giveaway! Go check it out, it's pretty fun.

I'll even give you a peek at what I'm giving away...


So head over there and enter to win!


yeah, I made that... nbd

I am so excited right now!  I just FINISHED my first actual crochet project!
I know, I know, I'm a nerd, but I'm still excited!  It looks pretty good, not all wonky like my previous attempts at crocheting!  See:


I got the pattern from this great yourube video:


Now I want to do more!  I think I may be in need of a new scarf!


Insta-Friday & Recovering from Christmas

I'm back!  I hope everyone had a wonderful Christmas.  I'm still recovering form the festivities, and I still have a second Christmas this weekend!  It's become almost a tradition to have Christmas after Christmas with the hubby's family.  Works for me since I am such a procrastinator!  Plus, it prolongs Christmas a little bit more.  Win win, right?!  I'd share my photo's from Christmas with you, but I was lame and didn't pull out my camera once!  There were two fancy pant cameras out all night, so I just picked one up and shot away.  The only problem with that is I didn't come home with any!  I have to wait for them all. =(

So, here is what I do have in pictures, from my phone {I always have that on me}

First things first, If you follow me on twitter than you might have seen my post about making the most random Christmas present ever.  Well, I couldn't share pictures then, because it was a Christmas gift, duh... So, here it is...

A panda spewing a rainbow!!!
The whole time I was making it I was thinking to myself 'wow, I can't believe I am making this!' and then I would giggle at myself a bit, and then continue on.  I feel like I should also explain why I would make this for my brother to begin with.  See, he is the most random kid I know.  He loves the goofiest stuff, including panda's and especially panda's spewing rainbows!  Seriously, he has a shirt with it, and it was his facebook picture for a while.  Also, every year he asks for money, and that's not how I roll, so this is what he got!  This was my first attempt at applique, so I'm pretty happy with how it turned out, I even put in a zipper, which scared me a little, but it turned out great.  And, most importantly he loved it!

As it turns out, we are quite the crafty family!  My aunt made this for me and Matt


Isn't that amazing!?!  She has made a few of them now, and a m so excited to get one for myself!  I keep telling her she needs to sell them, they are way too cute!

Also, my little sister {who is 15} made this awesome piece for Matt


I think it is so neat that she took the time to make something so thoughtful and so much fun!

Christmas day was pretty nice, we just ate, drank and hung out.


... see the hanging out going on. =)

Also, since it's Christmas my friend came home for a visit from Rhode Island, so we hit up the thrift stores of course!  I scored majorly on jeans and shoes, but the shoes make a much better picture, see...


I'm pretty sure I paid less than $5 a pair. Yay for thrifting!

I hope you all are enjoyed your week.  Have a marvelous Friday night!

linking up with
life rearranged


For all you owl lovers!

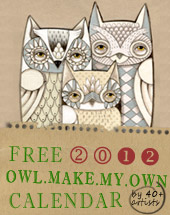
I came across the cutest printable calendars today, and they are all about owls!  I'm not sure when I began obsessing liking owls so much, but they are just so cute, and seem to be everywhere now.  When I saw this 'create your own' calendar I knew I had to share!

Owl Lover 2012 Calendar

So, get to it!  Make one, or more!  Or just print out the ready made one.  Enjoy your year of cute owls!

Ribbon Jewelery Frame

I have been in need of a new solution for my earrings for a while now.  I have a neat stand that my husband made me years ago out of perforated stainless, but it was better for posts than 'hook' earrings.  So, I thought I'd go ahead and make myself something I could attach all kinds of earrings on. And I came up with this.


And, since I was making it I figured I could share! So, here we go.  You only need three things to make this project:

an old (or new) frame - which I happened to have saved for something like this

ribbon - I chose a semi-stiff transparent ribbon, so I could poke earrings through easily

and last but not least -  hot glue


First thing's first, take your old frame...


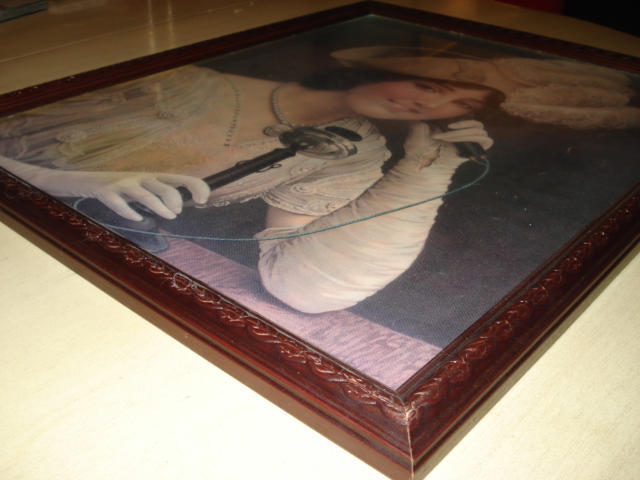
and remove the print, glass and backing.
Now you will have a blank frame.


I measured out where I wanted my ribbon, but you can eyeball it if you want.  Next dab a little bit of hot glue on one of your marks and attach your ribbon.


After it has cooled down a bit I like to add another layer of hot glue on top, and fold down the tail of the ribbon.  It looks like a globby mess of hot glue, but it should hold well.


Attach all the ribbons to one side and let them cool before attaching them to the other side.


Do the same on the other side, making sure to pull the ribbon pretty tight. Cut off any extra ribbon.  And you're done!


Super fast and easy project that is super cute and practical!


Now I just have to finish filling it with all my earrings!

If you make one yourself I would love to see them! It could be so fun with different ribbon, or painting the frame a fun color.  Hope you enjoyed!

Flower Hair Accessory Tutorial

I FINISHED!!!  Yay!


These actually were pretty quick and easy once I figured out how to make them, so I thought I'd create a tutorial to share!

This all started with a trip to a local bridal boutique, shopping for my friends wedding dress, and our bridesmaid dresses.  When she went to try on veils we found that even a really simple veil was about $200! So, I told her I would be happy to make her veil for her (I made mine and it was pretty easy).  Then when we looked at hair pieces for us bridesmaids they were pretty pricey too.  So I thought (out loud) I could make those... and so, I made those. ;)  It worked out nicely, she got the EXACT color that she wanted, and I made all eleven for the price of one from the store!

So, here it goes, my first full tutorial. Sorry for the not so awesome pictures.

First of all here is what you are going to need:


Flowers or Flower petals
Felt
Tulle
Feathers (I chose two kinds)
Rhinestones
Hair clips or combs
Hot glue
Scissors
I also used a rotary blade and mat, but that's optional

The first thing I did was cut my tulle into 6 inch squares. I did so with my rotary blade, but scissors work just fine.  You will need two squares for each hairpiece you are making.  I made 11 so I needed 22.


Then I cut all my felt pieces.  I made them all hearts.  Why? Why not!  I could have just made a circle, but this was more fun!


Now comes the fun part!  If you have pre-made flowers then this is an easy step for you, just glue your flower to the felt!  If you are using petals like I am (we could not find a single hot pink flower) Then follow along.
Take your first petal add a dot of hot glue on the base and center it on your felt.


Now continue until you have a full flower.  Tip: flowers usually have an odd number of petals, so try to do 5 or 7 if you can.  I did 7 each.


Now that your flower is done it's time to add the tulle!  I took my two 6 inch squares and laid them on one another like this:


Then I pinched the center and twisted it up like this:


That's what give it that nice wavy texture.  Then apply hot glue on the twist and apply it to the center of your flower.  When I did this I found it was easier if I stuck a pin in the twist to help hold it while I glued.


Pull open the tulle to the way you want while the glue is still hot.  Also, if you used a pin pull it out now too.  Press down on your center to get it as flat as possible.  Warning: YOU WILL GET HOT GLUE ON YOUR FINGERS!  If you want to avoid this use the back of a pen or something for this step.

Now it is time for FEATHERS!  I found these feathers on a band at Michaels.  I thought they were neat because some of them have little seed beads up the quill.  Anyways, I played around with the amount I wanted to use, and decided on 4 or 5, so I cut a small section and trimmed the end a bit.


After I played around with the placement I glued them to the center of the flower.  Now it looks like this.


I wanted a little more body in there, so next I added a 'fluffy' feather the same as the others.


Now for a little SPARKLE!  I used simple and inexpensive rhinestones for the centers.  They give a nice sparkle, and hide all the ugliness in the center. When you apply the rhinestones make sure to apply the hot glue to the center of the flower, and then place the rhinestone on top.  When I tried to apply the glue straight to the rhinestone it 'melted' a piece of the reflective backing off and ruined it.


Almost done!  Flip your flower over so it is face down.


See, the heart is super cute!  ;)  Even though you will never really see it, its there.
Now to add you clip.  Make sure it is facing the right direction so when you put it in your hair it's not upside-down.  Add a dab of hot glue where the base of your clip should be and attach.


And Voila! You are done!


Just to give you an idea of how big they are and how they actually look in your hair.


All eleven of them!  Yup, she has a lot of friends!  Love you Steph!


Related Posts Plugin for WordPress, Blogger...
Pin It button on image hover